Sunday, June 15, 2014

Dandelion Art for Dads

Materials needed:
• Paper
• Paint (green, white, and brown- 50 cents each at Walmart) 
• Markers/crayons 

What I Did:
• First, write the words at the top of the paper/card: "Dad, I think you're dandy, and I'm not lion
• Then paint the brown seed in the middle of the dandelion, a simple brown circle. 
• Then paint the green stem.
• It may be best to let it dry before you paint the white dabs of the seeds you blow. And voila! 

Sunday, June 8, 2014

Foam Dollar Tree Crowns

Materials: 
• Foam crowns (found at Dollar Tree in a pack of 20 in 5 different colors) 
• Stickers, feathers, plastic rhinestones, markers, crayons, pencils/pens, etc. (anything possible that can decorate your crown) 
• Glue (if needed)

What I did: 
• Before craft time, I wrote Revelation 6:2 on every crown in pen (I preferred the KJV because it seemed clearer and explained more about conquering) 
• I then passed out the decorative items and glue used to paste on the feathers and rhinestones. 
• Be sure to explain what the verse means if some students don't understand. My students were able to explain to each other that Jesus is the King of Kings and will reign and conquer forever which made great discussion! 

Sunday, April 6, 2014

Bunny Masks

Materials: 
• paper plate 
• white construction paper 
• pink construction paper 
• cotton balls 
• glue 

What I Did:
     First, cut out ears (pink and white seperate) and cut the middle of the paper plate out. The student will do all of the glueing. Glue the pink part of the ear to the white part of the ear. Then glue the ears to the back of the paper plate cut-out. Then glue the cotton balls to the outside of the paper plate. And vĂ³ila! 

Saturday, February 22, 2014

Things I'm Thankful For...

Materials Needed:
• paper 
• writing utensil 

How I Did it: 
Draw a circle in the middle of the paper. Fold the paper in multiple ways, creating different lines emitting from the center. In each space created by the folds, write different things you are thankful for. 


Sunday, September 22, 2013

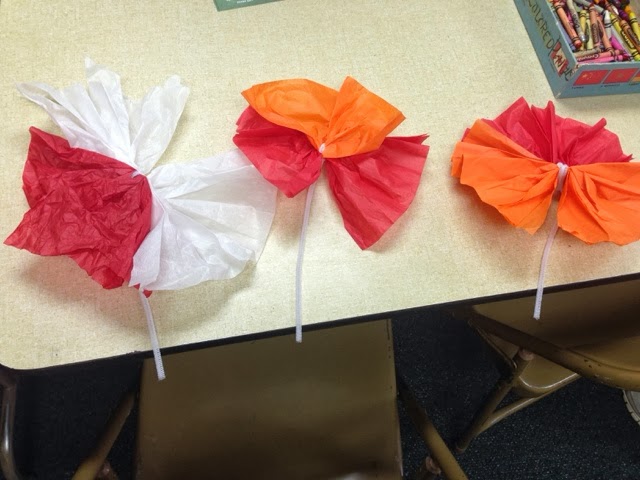
Tissue Paper Flowers

Tissue Paper Flowers 

Materials:
• tissue paper 
• pipe cleaners 

What I Did:
Fold two pieces of tissue paper like a fan (opposite directions each time you fold), put them together, on top of each other, and the twist the pipe cleaner around the middle of them both. Fan the tissue paper out on each side and you have a flower. You can even spray the flowers with good smelling perfume or scent spray! 

Sunday, September 8, 2013

Origami Flowers

Origami Flowers

Materials:
• construction paper (standard size)

What I Did:
You could use any origami object of your choice. I just happened to know how to make flowers easily. Be very thorough and direct with everything you say. And add details. Children need details to understand better. Can be used at any time of the year! 


Sunday, September 1, 2013

Finger Painting the World

Finger Painting the World 

Materials:
• Washable or water-based paint
• Poster board or large paper 
• Aprons or garbage bags to put over students while painting 
• Paper plates or something to hold paint in while they paint 

What I Did:
This project took three weeks. I required the children to wear garbage bags so they did not get paint all over their Sunday  clothes. I first drew the outlines of the world and the different countries I wanted to be shown. Then I assigned them different colors per student. They had the same color every week we worked on this project, and they knew if they were to paint the ocean or the land (blues for ocean and greens and browns for land). At the end, I had everyone paint thumb prints on the outside of the world and write their names next to it. Also, I only had them use their thumbs, so it had a more effective look. I think it went well! Supervise all of the time!!