Sunday, September 22, 2013

Tissue Paper Flowers

Tissue Paper Flowers 

Materials:
• tissue paper 
• pipe cleaners 

What I Did:
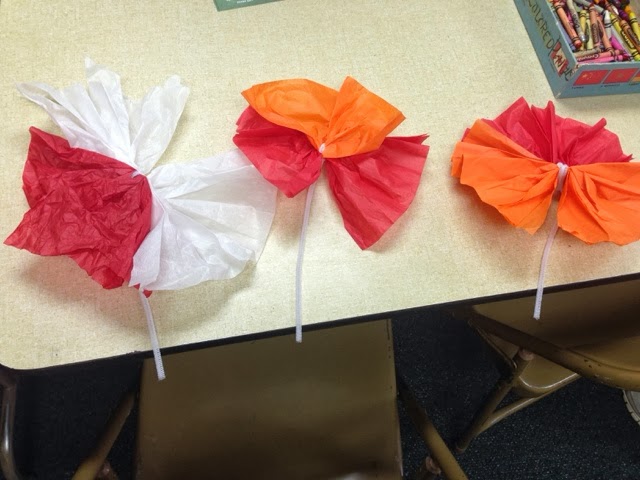
Fold two pieces of tissue paper like a fan (opposite directions each time you fold), put them together, on top of each other, and the twist the pipe cleaner around the middle of them both. Fan the tissue paper out on each side and you have a flower. You can even spray the flowers with good smelling perfume or scent spray! 

Sunday, September 8, 2013

Origami Flowers

Origami Flowers

Materials:
• construction paper (standard size)

What I Did:
You could use any origami object of your choice. I just happened to know how to make flowers easily. Be very thorough and direct with everything you say. And add details. Children need details to understand better. Can be used at any time of the year! 


Sunday, September 1, 2013

Finger Painting the World

Finger Painting the World 

Materials:
• Washable or water-based paint
• Poster board or large paper 
• Aprons or garbage bags to put over students while painting 
• Paper plates or something to hold paint in while they paint 

What I Did:
This project took three weeks. I required the children to wear garbage bags so they did not get paint all over their Sunday  clothes. I first drew the outlines of the world and the different countries I wanted to be shown. Then I assigned them different colors per student. They had the same color every week we worked on this project, and they knew if they were to paint the ocean or the land (blues for ocean and greens and browns for land). At the end, I had everyone paint thumb prints on the outside of the world and write their names next to it. Also, I only had them use their thumbs, so it had a more effective look. I think it went well! Supervise all of the time!! 


Letters to Our Future Selves

Letters to Our Future Selves


Materials:
• Paper
• Envelopes
• Writing utensils 

What I Did:
I passed out paper and writing utensils and helped the children out with what they should write down in a letter that will be given to them once they graduate from my class. I included things such as "2 most recent things God has done in your life" and "What you want to be when you grow up". I also had them write on the outside of the envelope their name and what grade they are in now so I know how to differentiate them from each other in different grades. I will give it back once they graduate from the class and they will see (maybe!) how different their life and opinions are now. 


Daniel and the Lions' Den

Daniel and the Lions' Den

Materials:
• Cupcake papers/holders
• Markers
• Construction paper
• Glue

What I Did:

I wrote "Daniel in the lions' den" at the top and "God sent an angel to shut the lions' mouths." at the bottom of the page. Then I drew a stick figure of Daniel (and you can also draw the angel since the angel was addressed) and then I drew lion faces inside of the cupcake papers and glued them down to the paper with Elmer's glue. Simple and fast!


Sunday, July 14, 2013

Ways to Stop Unfriendly Teasing

Materials:

  • Paper
  • Anything to write/color with (pencil and markers, crayons, colored pencils, etc).
  • Dry Erase board/chalk board (totally optional)**

What I Did:

This is super easy to do last minute. 
I passed out paper to each of the kids and told them to draw their hand with a pencil on the paper, and draw a little bit of an arm for later (in case we have extra ideas). Then I drew on a dry erase board so that all of the students could see. I drew my own hand and arm and I wrote 1, 2, 3, 4, and 5 on each of my fingers, circled. Then I asked the class what they think are some good ways they think to handle a situation they are in if they are being teased or are being treated badly while at school. As we wrote down the ideas, I had them write them down on their sheets too. I had them draw a little bit of arm in case anyone else throws something out and you have already reached five total. Then just start numbering them off down the arm.
At the end, if extra time allows, color the papers. Coloring always takes up time. :)

Locks Game

Materials:

  • Small locks (about 8-10)
  • Keys that match every lock
  • Paper to write verses on
  • Something to contain all of the above supplies

What I Did:

I bought the cheapest, smallest locks I could find at Big Lots ($2 per lock) and wrote down easy-to-memorize verses on them, and put where in the Bible they are found on the keys (or the other way around, as shown in the picture below). I placed them in the middle of a circle of children and told them to go for it. 
You could easily reuse these keys and locks again for other purposes, maybe books of the Bible or stories in the Bible, etc. Any category that you can pair with something else works great.